


Wildlife, Culture & Conservation
Best Photography Tips for Capturing Africa’s Big Five
Best Photography Tips for Capturing Africa’s Big Five
Photographing Africa’s Big Five requires more than just pointing and shooting. This comprehensive African wildlife photography guide is designed for safari enthusiasts, wildlife photographers, and adventure travelers who want to capture stunning images of lions, elephants, leopards, buffalo, and rhinos.
Getting close to these magnificent animals demands the right approach and technical know-how. Many photographers return from safari disappointed because they didn’t understand the specific challenges each species presents. Lions require different wildlife photography techniques than elusive leopards, and massive elephants need completely different camera settings than charging buffalo.
We’ll walk you through essential safari camera equipment that can make or break your shots, from telephoto lenses to camera bodies that handle African dust and heat. You’ll also master the camera settings and composition techniques that separate amateur snapshots from professional-quality big five photography. Finally, we’ll dive into species-specific strategies, including proven lion photography guide methods and specialized leopard photography tips that help you capture these elusive cats in their natural habitat.
Essential Camera Equipment for Big Five Photography

Choose telephoto lenses for safe wildlife distances
Wildlife photography in Africa demands respect for both your safety and the animals’ natural behavior. A quality telephoto lens becomes your most critical piece of safari camera equipment, allowing you to capture intimate moments without disturbing the Big Five.
The 300-400mm range works perfectly for most African wildlife photography situations. This focal length gives you enough reach to photograph lions lounging under acacia trees or elephants bathing at watering holes while maintaining a safe distance that guides recommend. For those serious about big five photography tips, consider investing in a 500-600mm lens, especially for photographing elusive leopards or capturing rhino photography techniques from afar.
Image stabilization technology proves invaluable when shooting handheld from safari vehicles. The constant vibration and movement can ruin otherwise perfect shots, but modern stabilized telephoto lenses compensate for this challenge effectively.
Don’t overlook the importance of a fast maximum aperture. Lenses with f/2.8 or f/4 apertures allow you to shoot during the golden hours when wildlife is most active. Early morning and late afternoon provide the best lighting for your African wildlife photography guide shots, but these conditions often require faster glass to achieve proper exposure.
Weight becomes a factor during long safari days. Consider lighter telephoto options or bring a monopod to reduce fatigue while maintaining stability for those crucial wildlife photography techniques.
Pack extra batteries for extended safari sessions
Safari days start before sunrise and often extend past sunset, putting tremendous demands on your camera’s battery life. Cold morning temperatures in places like Kenya’s Masai Mara or South Africa’s Kruger National Park can drain batteries faster than expected.
Bring at least four fully charged batteries for each camera body. This might seem excessive, but continuous autofocus tracking, image stabilization, and frequent image review quickly deplete power reserves. Professional wildlife photographers typically rotate between three batteries throughout the day while keeping one charging in the vehicle.
Invest in a car adapter or portable power bank specifically designed for camera batteries. Many safari vehicles offer 12V outlets, making it possible to charge batteries during long drives between game viewing areas. This proves especially valuable during multi-day camping safaris where electrical outlets are scarce.
Cold weather battery performance drops significantly. Keep spare batteries close to your body to maintain their temperature, and avoid leaving them exposed in the camera bag overnight. Some photographers use hand warmers to keep batteries at optimal operating temperature during early morning game drives.
Battery grips offer extended shooting time and improved ergonomics when using heavy telephoto lenses. They’re particularly useful for lion photography guide sessions where you might need to shoot continuously for extended periods.
Bring multiple memory cards for continuous shooting
High-resolution RAW files fill memory cards quickly, especially when photographing fast-moving wildlife with continuous shooting modes. A single charging elephant or fleeing buffalo can generate dozens of frames in seconds, making adequate storage capacity essential for successful African safari photography.
Carry at least 128GB of storage capacity, distributed across multiple cards rather than relying on one large card. If a single high-capacity card fails or becomes corrupted, you could lose an entire day’s worth of irreplaceable wildlife encounters. Spreading your images across multiple 32GB or 64GB cards minimizes this risk.
Fast write speeds become critical when shooting in continuous mode. Look for cards rated UHS-I or UHS-II with write speeds of at least 90MB/s. Slower cards create buffer delays, causing you to miss crucial moments when a leopard finally emerges from thick bush or when young lions begin playing together.
Professional wildlife photographers often use a dual-card camera setup, writing the same images to two cards simultaneously. This redundancy protects against card failure and provides peace of mind when capturing once-in-a-lifetime wildlife photography techniques.
Organization matters during multi-day safaris. Label your cards clearly and establish a system for tracking used versus unused cards. Some photographers use different colored cases or tape to identify card status quickly.
Use sturdy tripods for sharp long-distance shots
While much of African wildlife photography happens from moving vehicles where tripods aren’t practical, certain situations demand rock-solid support for your safari camera equipment. Early morning and late evening shots, when light levels drop and shutter speeds slow, benefit enormously from tripod stability.
Carbon fiber tripods offer the best balance of strength and weight for safari conditions. They handle the constant vibration of vehicle travel better than aluminum alternatives and won’t become burning hot under the African sun. Look for models that extend to eye level without using the center column, as this maintains maximum stability.
Leg locks should operate smoothly even when dusty or sandy. Africa’s game reserves present challenging conditions, and standard twist locks often jam with fine sand particles. Flip locks or quarter-turn mechanisms prove more reliable in these environments.
Heavy telephoto lenses require robust tripod heads designed for wildlife work. Gimbal heads excel for tracking moving animals, allowing smooth panning motion while supporting the lens’s weight perfectly. Ball heads work well for static compositions but can struggle with the weight and length of super-telephoto lenses.
Spike feet or sand spikes replace standard rubber feet in soft ground conditions. Many African camps and lodges feature sandy or loose soil surfaces where standard tripod feet simply sink or slip during longer exposures.
Master Camera Settings for Wildlife Action

Set fast shutter speeds to freeze animal movement
Wildlife photography techniques demand precision when capturing the Big Five in motion. Your shutter speed becomes the most critical factor in freezing those explosive moments – a charging elephant, a leaping lion, or a galloping buffalo.
Start with 1/1000th of a second as your baseline for African safari photography. This speed handles most wildlife scenarios, from a walking rhino to birds taking flight nearby. When anticipating high-speed action like lions hunting or elephants mock-charging, bump your shutter speed to 1/2000th or even 1/4000th of a second.
Different animals require different approaches. Leopards move with deceptive speed despite their seemingly relaxed demeanor. Their sudden pounces or tree-climbing antics need at least 1/1250th of a second. Elephants appear slow but can reach surprising speeds – their massive ears flapping creates motion blur even at moderate shutter speeds.
Use your camera’s shutter priority mode (S or Tv) to maintain control over motion freezing while letting the camera adjust aperture automatically. This saves precious seconds when animals suddenly spring into action.
| Animal Behavior | Recommended Shutter Speed | Example Scenarios |
| Resting/Grazing | 1/500s – 1/800s | Lions lounging, elephants feeding |
| Walking/Stalking | 1/1000s – 1/1250s | Leopards hunting, buffalo moving |
| Running/Charging | 1/2000s – 1/4000s | Lions chasing, elephants charging |
Adjust ISO for optimal exposure in varying light
African lighting conditions change dramatically throughout the day, making ISO management crucial for big five photography tips success. Dawn and dusk – prime wildlife viewing times – present challenging low-light scenarios that test your camera’s capabilities.
Modern cameras handle ISO 1600-3200 beautifully, producing clean images with minimal noise. Don’t fear higher ISOs when the shot demands it. A sharp image with some grain beats a blurry masterpiece every time. Many photographers make the mistake of keeping ISO too low, resulting in underexposed images or forcing slower shutter speeds that blur motion.
Start your safari day with ISO 400-800 during golden hour conditions. As the harsh midday sun appears, drop to ISO 100-200 for maximum image quality. Late afternoon and evening game drives require ISO 800-1600, sometimes pushing to 3200 for those magical sunset silhouettes.
Auto ISO becomes your friend during unpredictable wildlife encounters. Set your maximum ISO to 3200 (or higher if your camera performs well) and minimum shutter speed to 1/1000th. This combination ensures sharp images regardless of lighting changes as animals move between shade and sunlight.
Dense bush environments, common in leopard photography settings, often require higher ISOs even during daylight hours. The dappled light filtering through acacia trees creates exposure challenges that demand flexibility.
Use continuous autofocus for moving subjects
Continuous autofocus (AI Servo for Canon, AF-C for Nikon and Sony) transforms your wildlife photography guide success rate. This mode tracks moving subjects, constantly adjusting focus as animals approach or move across your frame.
Single-point autofocus works best for precision targeting. Select the center focus point for maximum accuracy and speed. Your camera’s center point typically offers the highest sensitivity and fastest acquisition. When tracking animals, place this point on the animal’s eye – the most critical sharp element in any wildlife portrait.
Advanced cameras offer sophisticated tracking modes that recognize and follow subjects automatically. These work exceptionally well for elephant photography settings where the massive subjects are easy to track, but exercise caution with smaller, faster animals like leopards where the system might get confused by background elements.
Back-button focus revolutionizes your shooting technique. Separate focus activation from the shutter button by assigning focus to a rear button (usually AF-ON). This prevents the camera from refocusing when you half-press the shutter, giving you complete control over when to acquire and lock focus.
Practice tracking techniques before your safari. Follow moving objects – cars, runners, even pets – to develop muscle memory. Smooth panning motions keep your subject centered in the viewfinder while the continuous autofocus system maintains sharp focus throughout the sequence.
Use burst mode combined with continuous autofocus to capture sequences of animal behavior. Even if the first frame misses perfect focus, subsequent frames often nail the critical moment as the autofocus system locks onto your subject.
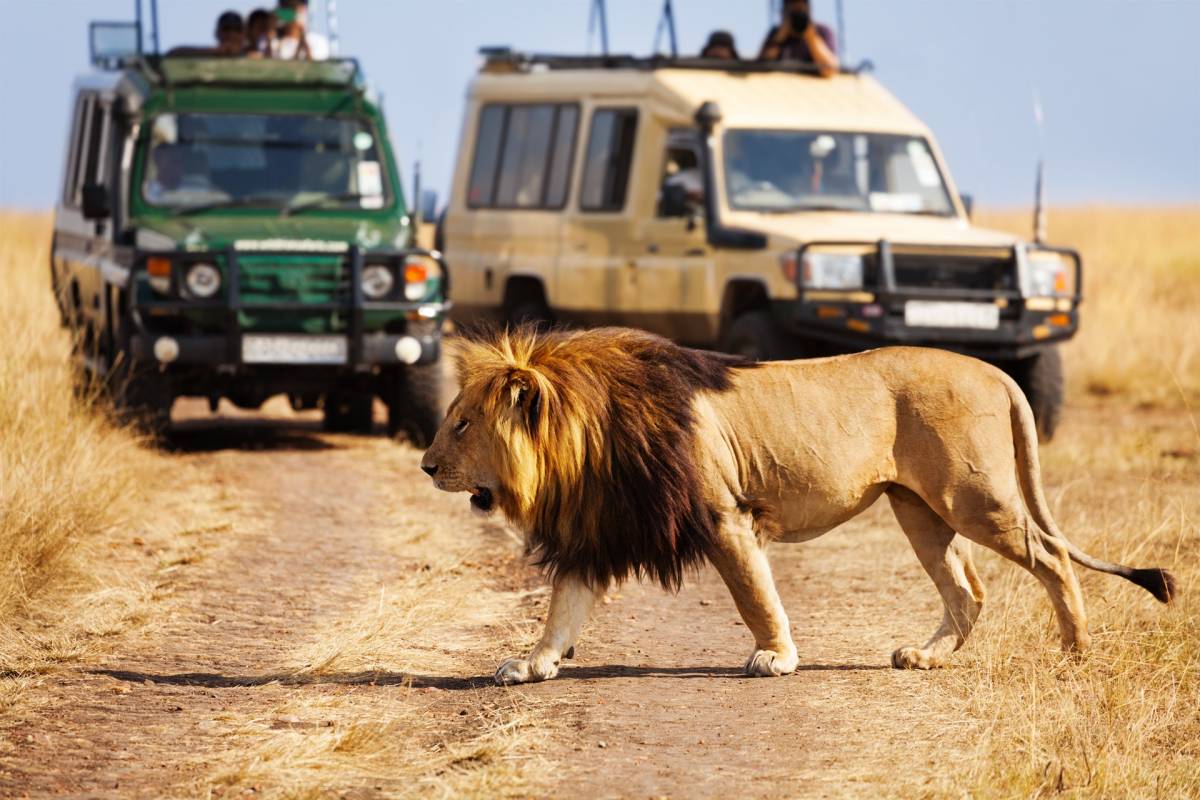
Lion Photography Techniques That Deliver Impact

Capture Pride Dynamics During Golden Hour Lighting
The magic happens when the sun sits low on the horizon, painting everything in warm, golden light. Lions become most active during these early morning and late evening hours, making it the perfect time for African safari photography. The soft, directional light eliminates harsh shadows that plague midday shots while bringing out the rich textures in their golden coats.
Position yourself where you can observe the entire pride’s behavior. Watch for interactions between cubs and adults, grooming sessions, or the gentle nuzzling that shows their social bonds. These moments tell compelling stories that single lion portraits simply can’t match. The golden hour light adds drama to every scene, turning ordinary moments into extraordinary wildlife photography opportunities.
Keep your camera ready for quick action. Pride dynamics change rapidly – one moment they’re resting peacefully, the next they’re engaged in playful wrestling or territorial displays. Shoot in burst mode to capture the perfect expression or gesture within these fleeting interactions.
Focus on Facial Expressions and Eye Contact
Eyes are the windows to a lion’s soul, and sharp eye contact creates an immediate emotional connection with viewers. When photographing lions, make the eyes your primary focus point. Even if other parts of the image are slightly soft, tack-sharp eyes will carry the entire photograph.
Lion expressions range from intense hunting focus to playful curiosity to regal composure. Watch for these subtle changes and be ready to capture them. A lioness scanning the horizon for prey displays a completely different energy than cubs playing with their siblings. These variations in expression add depth and storytelling power to your lion photography guide collection.
Use single-point autofocus mode and place it directly on the nearest eye. If the lion is at an angle, focus on the eye closest to your camera. This technique ensures maximum sharpness where it matters most. Don’t forget to consider the background – a clean, uncluttered backdrop helps the lion’s intense gaze stand out even more dramatically.
Photograph Hunting Behavior From Respectful Distances
Hunting sequences offer some of the most thrilling wildlife photography techniques, but they require patience, preparation, and respect for the animals’ natural behavior. Never interfere with or get too close to hunting lions – this disrupts their natural patterns and puts both you and the animals at risk.
Use a telephoto lens with at least 400mm reach to maintain safe distances while capturing intimate hunting moments. Watch for pre-hunt behaviors like crouching low, focused stalking, or coordinated pride movements. These preparatory actions often provide more photogenic opportunities than the actual kill itself.
The key to successful hunting photography lies in anticipation. Learn to read lion body language – ears pinned forward, low crouch, intense focus – these signals indicate action is about to unfold. Position yourself where you can capture multiple angles of the hunt without repositioning your vehicle, as movement during critical moments can ruin the shot.
Frame Mane Details in Close-Up Portraits
A male lion’s mane is his crown, and close-up portraits celebrating this magnificent feature create some of the most powerful big five photography tips images. Each mane has unique characteristics – color variations from blonde to deep black, different textures, and distinctive patterns that make individual lions recognizable.
Fill your frame with the mane’s intricate details while keeping the lion’s face as your anchor point. Side lighting works particularly well for mane photography, as it highlights individual strands and creates depth through shadows and highlights. Avoid shooting directly into the light, which flattens the mane’s texture and reduces visual impact.
Consider different angles for mane portraits. A low angle looking up emphasizes the lion’s dominance and makes the mane appear even more impressive. Profile shots showcase the mane’s full volume and flow, while slight front angles capture both mane detail and facial features. Experiment with shallow depth of field to isolate specific mane sections while keeping the eyes critically sharp.
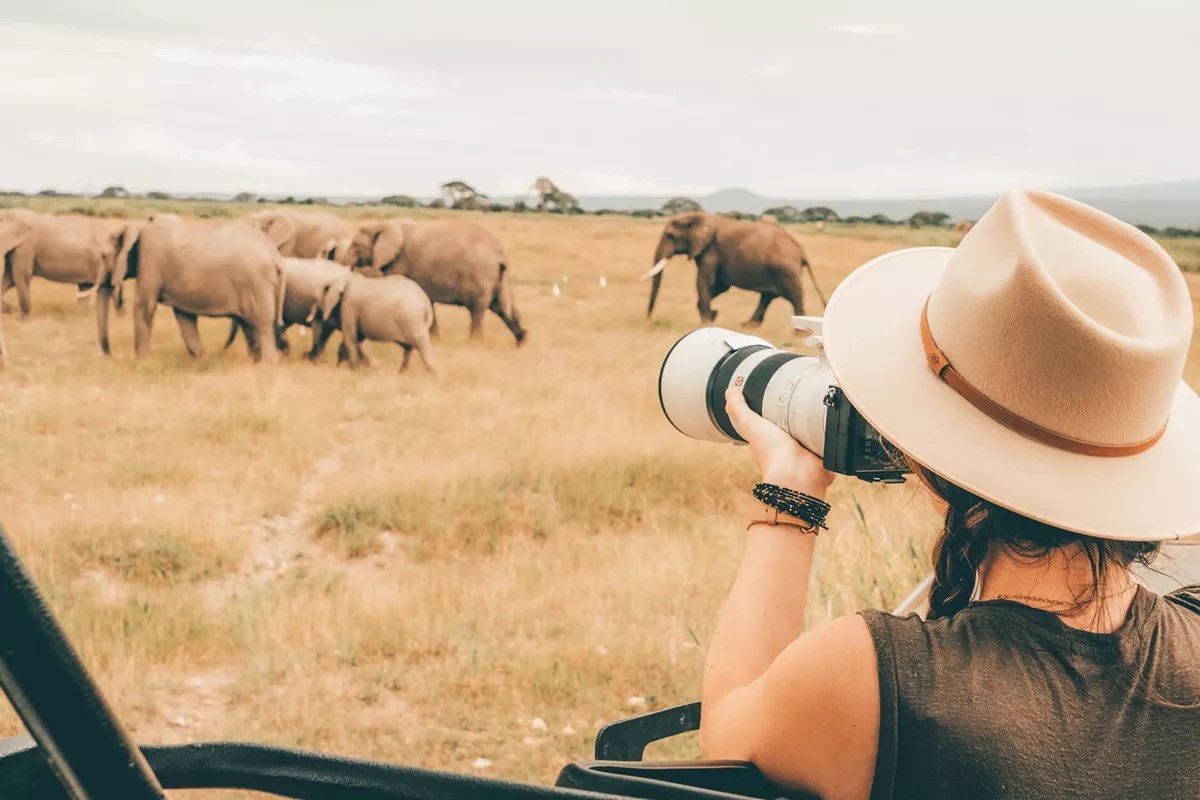
Elephant Photography Strategies for Stunning Results

Shoot from Low Angles to Emphasize Their Massive Size
Getting down low transforms ordinary elephant photographs into powerful, imposing images that showcase their incredible scale. Position yourself at ground level or crouch down to capture these gentle giants from below. This elephant photography technique creates a dramatic perspective that makes viewers feel dwarfed by the subject’s massive presence.
The low angle approach works especially well when elephants are walking toward you or standing on elevated ground. Their enormous bodies fill the frame, while their tusks and trunk appear more prominent against the sky. This African safari photography method adds visual weight to your images and helps convey the true magnitude of these magnificent creatures.
Use a wide-angle lens between 16-35mm to maximize the effect while maintaining sharp focus throughout the frame. Keep your camera steady by using a beanbag or low tripod, and be ready to adjust your position quickly as elephants move. The payoff is dramatic imagery that captures both the physical presence and emotional impact of encountering these incredible animals in the wild.
Capture Family Interactions and Baby Elephants
Elephant herds provide endless opportunities for heartwarming wildlife photography. Focus on the tender moments between mothers and calves – nursing sessions, protective gestures, and playful interactions that reveal their complex social bonds. Baby elephants stumbling around on unsteady legs or seeking shelter beneath their mothers create compelling storytelling images.
Watch for grooming behaviors, where elephants use their trunks to clean and care for each other. These intimate moments happen regularly within the herd and showcase their emotional intelligence. Position yourself where you can observe multiple family members in a single frame, creating layered compositions that tell richer stories.
The golden hours provide soft, warm lighting that enhances these emotional scenes. Use a telephoto lens (200-400mm) to maintain respectful distance while capturing detailed expressions and gestures. Patience pays off when photographing elephant families – the most authentic moments often happen when they’re relaxed and unaware of your presence.
Highlight Textural Details of Skin and Tusks
Elephant skin tells incredible stories through its weathered texture, scars, and unique patterns. Move in close with your telephoto lens to capture the intricate details that make each individual unique. The deep wrinkles, mud-caked surfaces, and battle scars create powerful abstract compositions that work beautifully in black and white or color.
Tusks deserve special attention in your big five photography. The ivory’s smooth surface contrasts beautifully with the rough skin texture, while chips and wear patterns reveal each elephant’s life history. Side lighting emphasizes these textural differences and creates depth in your images.
Look for moments when dust or mud highlights the skin’s texture – elephants rolling in dust baths or emerging from mud wallows provide perfect opportunities. These wildlife photography techniques help create images with tactile quality that viewers can almost feel. Focus on specific body parts like the trunk tip, eye wrinkles, or ear edges to create striking detail shots that complement your wider environmental portraits.
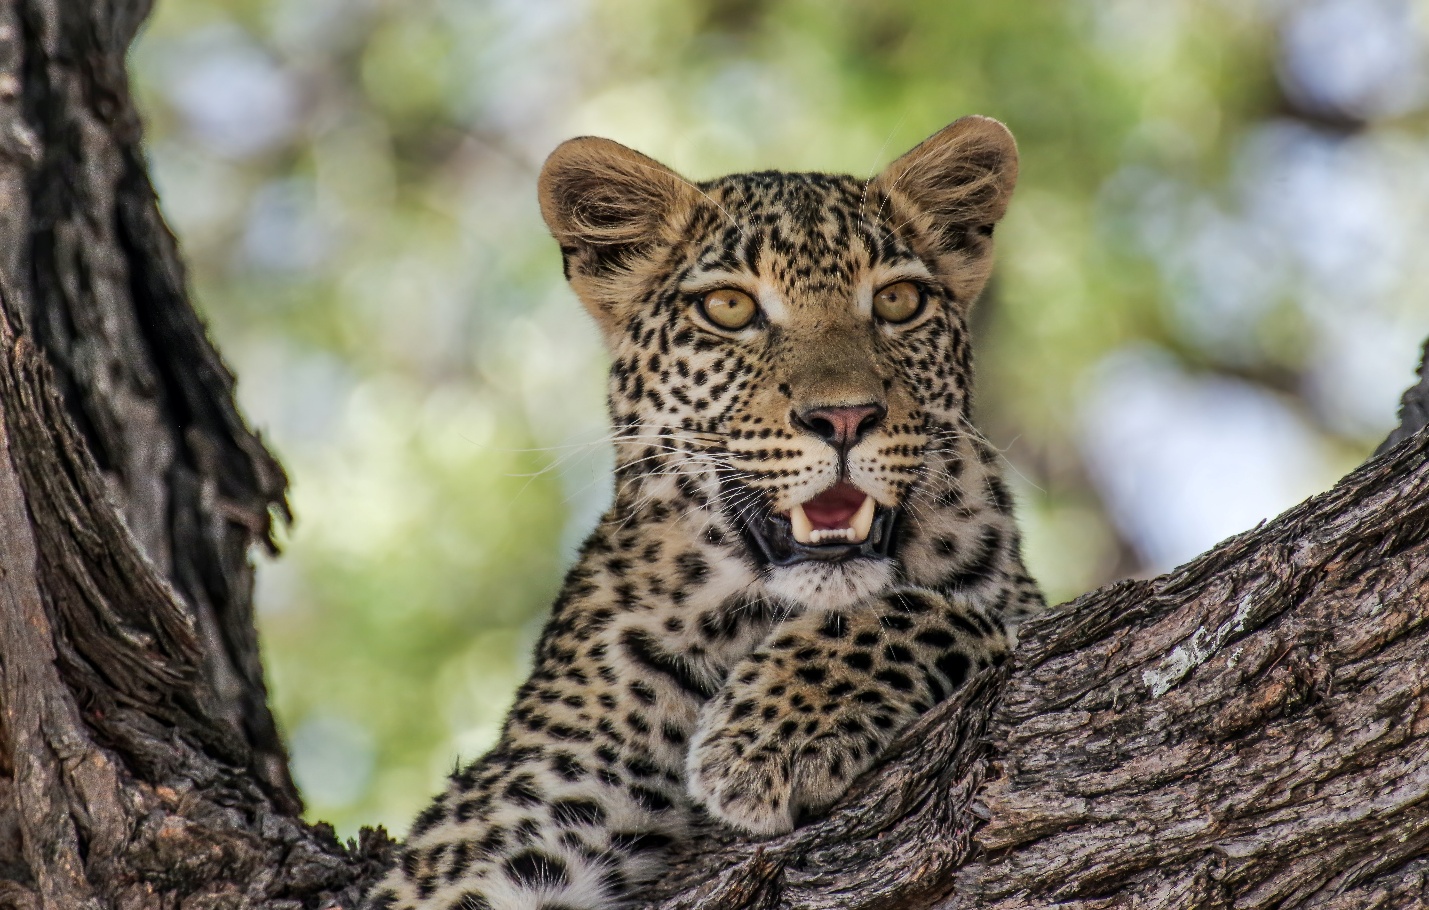
Leopard Photography Methods for Elusive Subjects

Use High ISO Settings for Low-Light Tree Photography
Leopards love their afternoon siestas in the shade of acacia trees, which creates a photography challenge that separates amateur safari photographers from the pros. These magnificent cats often position themselves in heavily shadowed areas, requiring you to push your camera’s ISO capabilities to capture sharp, well-exposed images.
Start with ISO 3200 as your baseline for tree-dwelling leopards, but don’t hesitate to push it higher when needed. Modern cameras handle ISO 6400 and even 8000 remarkably well, especially when you consider the alternative is a blurry or underexposed shot. The key lies in understanding that some grain is infinitely better than missing the shot entirely.
Your shutter speed becomes critical here – aim for at least 1/500th of a second to freeze any subtle movements. Leopards might appear motionless, but they’re constantly adjusting their position, flicking their tails, or turning their heads to scan for prey below.
Wait Patiently Near Water Sources and Game Trails
Successful leopard photography requires the patience of a monk and the strategic thinking of a chess master. These solitary hunters follow predictable patterns, making certain locations prime real estate for photographers willing to invest time.
Position yourself downwind from well-used game trails, particularly those leading to water sources. Leopards typically hunt during the cooler hours of dawn and dusk, using these established pathways to move through their territory. The golden hour lighting during these times creates stunning conditions for leopard photography tips that actually work.
River crossings and natural funnels where multiple trails converge offer exceptional opportunities. Set up your equipment early and remain motionless – leopards possess incredible eyesight and will detect even the slightest movement from considerable distances.
Consider the wind direction carefully, as leopards rely heavily on their sense of smell. Even the faintest human scent can cause them to alter their route or abandon the area entirely.
Capture Their Distinctive Spotted Coat Patterns
A leopard’s rosette pattern is as unique as a human fingerprint, making it essential to showcase these distinctive markings in your wildlife photography techniques. The challenge lies in achieving sharp detail across their entire body while maintaining proper exposure on both the dark spots and lighter coat areas.
Use spot metering to expose for the mid-tones of their coat, avoiding the temptation to overexpose in an attempt to brighten shadow areas. Leopards have incredible contrast in their markings, and preserving this natural drama creates more impactful images than artificially brightening everything.
Focus on filling your frame with the leopard’s body to emphasize the rosette patterns. A 400mm lens or longer helps you capture fine detail without disturbing your subject. Pay special attention to the transition areas where rosettes meet solid coloring – these zones often tell the most compelling visual story.
Side lighting works beautifully for highlighting coat texture and pattern definition. Avoid harsh overhead sun, which creates unflattering shadows that obscure the intricate rosette details that make each leopard unique.
Document Their Solitary Hunting Behaviors
Unlike lions with their social dynamics, leopards offer photographers a chance to document pure predatory focus and individual character. Their hunting sequences unfold like carefully choreographed performances, requiring you to anticipate movement and behavior patterns.
Watch for subtle behavioral cues that signal an impending hunt: ears rotating to track sound, pupils dilating, muscles tensing, or the characteristic low crouch that precedes a stalk. These moments demand continuous autofocus modes and burst shooting capabilities.
Leopards often pause mid-hunt to reassess their approach, providing brief opportunities for dramatic action shots. Keep your finger ready on the shutter – these pauses rarely last more than a few seconds before they either abandon the hunt or explode into motion.
The aftermath of successful hunts provides equally compelling photographic opportunities. Leopards frequently drag their prey into trees, creating unique compositions that showcase their incredible strength and solitary nature. These scenes perfectly capture the essence of African safari photography at its most authentic.
Buffalo Photography Approaches for Powerful Images

Photograph Herd Movements During Migration
Cape buffalo create some of the most dramatic wildlife spectacles when they move as a massive herd. These powerful moments happen during seasonal migrations between water sources and fresh grazing areas. Position yourself at elevated viewpoints or alongside migration routes where you can safely capture the thunderous movement of hundreds or thousands of buffalo.
The dust clouds kicked up by moving herds add incredible atmosphere to your shots. Use a fast shutter speed of 1/500s or higher to freeze the action while keeping some buffalo sharp against the swirling dust. Wide-angle lenses work brilliantly here to show the scope and scale of the movement. Include foreground buffalo for depth and use the rule of thirds to position the horizon.
Early morning and late afternoon provide the best lighting conditions for herd photography. The golden hour illuminates the dust particles beautifully, creating natural backlighting that separates individual animals from the mass. Continuous autofocus mode proves essential when tracking moving subjects across your frame.
Focus on Weathered Faces and Curved Horns
Buffalo portraits showcase incredible character through their weathered features and distinctive horn formations. Male buffalo develop massive horn spreads called “bosses” that create a helmet-like appearance across their heads. These details tell the story of survival in Africa’s harsh wilderness.
Move in close with telephoto lenses to isolate individual buffalo faces. The 200-400mm range allows you to maintain safe distances while filling your frame with compelling details. Look for buffalo with interesting horn shapes, battle scars, or unique facial markings that add personality to your images.
Side lighting brings out texture in their coarse hair and emphasizes the weathered surfaces of their horns. Overcast conditions work particularly well for buffalo portraits because soft, even light prevents harsh shadows in their dark faces. Focus precisely on the eyes to create connection with viewers, even when the buffalo appears from a three-quarter angle.
Pay attention to ear positioning and facial expressions. Alert buffalo with forward-facing ears create more engaging portraits than relaxed animals with drooping ears. Patience rewards photographers who wait for that perfect moment when the buffalo lifts its head or turns toward the camera.
Capture Mud-Bathing and Wallowing Activities
Water holes and muddy areas provide fantastic opportunities for dynamic buffalo wildlife photography. Buffalo regularly wallow in mud to cool down, remove parasites, and protect their skin from insects. These behaviors create action-packed scenes with splashing water, flying mud, and expressive body language.
Arrive at popular wallowing spots during the hottest parts of the day when buffalo seek relief from the sun. Position yourself with good sight lines to multiple wallows, as buffalo often move between different mud patches. Fast shutter speeds of 1/800s or higher freeze water droplets and mud spray for maximum impact.
Continuous shooting mode captures the sequence of wallowing behavior from initial approach through the rolling and splashing action. These sequences work brilliantly as photo series or for selecting the single most dynamic frame. Watch for moments when buffalo shake off excess water and mud, creating explosive action shots.
Safety becomes extra important around water sources where visibility might be limited and multiple species converge. Use longer focal lengths to maintain distance while still capturing intimate behavioral moments. The contrast between the massive buffalo and flying mud droplets creates powerful visual drama that showcases their wild nature.
Rhino Photography Tactics for Rare Encounters

Shoot Quickly Due to Limited Sighting Opportunities
Rhinos present some of the most challenging photo opportunities in African wildlife photography. With critically endangered populations across the continent, these magnificent creatures offer fleeting moments that demand lightning-fast reflexes and precise rhino photography techniques. Your camera should already be configured with optimal settings before you spot a rhino, as you might only have seconds to capture the shot.
Keep your camera in continuous autofocus mode and use a fast shutter speed of at least 1/500s to freeze any movement. Rhinos can move surprisingly quickly despite their bulk, especially when they catch your scent or feel threatened. Burst mode becomes your best friend here – take multiple shots in rapid succession to increase your chances of getting that perfect frame.
Position yourself downwind whenever possible and maintain a respectful distance. These animals have excellent hearing and smell, compensating for their relatively poor eyesight. Safari guides know the best spots for rhino encounters, so trust their expertise and be ready to shoot the moment they signal.
Emphasize Their Prehistoric Appearance and Horn Details
Rhinos carry an ancient mystique that separates them from other big five subjects. Their armored skin texture, massive build, and distinctive horns tell a story spanning millions of years. Focus on capturing these prehistoric qualities that make them so compelling.
The horn deserves special attention in your composition. These keratin structures represent both the rhino’s majesty and the reason for their endangerment. Use a telephoto lens to isolate horn details without getting too close. Side lighting works exceptionally well for highlighting the horn’s texture and the deep grooves in their weathered skin.
Capture the rhino’s profile to showcase their distinctive silhouette. The prehistoric skull shape, small eyes, and pointed ears create a dramatic composition that emphasizes their ancient lineage. Black and white conversions often work beautifully for rhino portraits, enhancing the timeless quality of these incredible animals.
Don’t overlook the environmental context. Wide shots showing rhinos in their natural habitat help tell the complete story of these remarkable survivors in Africa’s changing landscape.
Document Conservation Efforts and Anti-Poaching Activities
Your rhino photography can serve a greater purpose beyond beautiful images. Documenting conservation efforts adds powerful storytelling elements to your African safari photography portfolio. Rangers, veterinarians, and conservationists work tirelessly to protect these endangered giants, and their stories deserve to be told through compelling visuals.
Photograph dehorning procedures when possible – this controversial but necessary conservation practice helps protect rhinos from poachers. These images carry significant emotional weight and educational value. Always maintain ethical distance and follow strict guidelines from conservation teams.
Include shots of tracking equipment, ranger patrols, and monitoring activities. These behind-the-scenes images show the human dedication required to keep rhino populations stable. Wide shots of protected areas, fencing, and security installations help viewers understand the comprehensive approach needed for rhino conservation.
Consider documenting rehabilitation centers where orphaned rhinos receive care. These facilities often allow controlled photography sessions that can generate powerful images supporting conservation messaging.
Capture Mother-Calf Relationships When Possible
Rhino family dynamics offer some of the most emotionally powerful images in wildlife photography techniques. Mother-calf pairs represent hope for species survival and create compelling storytelling opportunities. These interactions showcase the gentle side of these seemingly aggressive animals.
Focus on tender moments – a calf nursing, walking closely beside its mother, or resting in her protective shadow. These intimate scenes contrast beautifully with the rhino’s intimidating reputation. Use a longer focal length to maintain safe distance while capturing detailed behavioral interactions.
Pay attention to positioning and body language. Mother rhinos remain extremely protective, and their posture often indicates their comfort level with your presence. Stress signals include repeated head lifting, ear positioning, and restless movement. Back away immediately if you notice these warning signs.
Timing becomes critical for family shots. Early morning and late afternoon often provide the best opportunities when rhinos are most active. Patience pays dividends – wait for natural interactions rather than trying to force compositions. The resulting images will authentically represent these precious family bonds that are essential for species recovery.

Getting great photos of Africa’s Big Five comes down to having the right gear and knowing how to use it. Pack a telephoto lens, extra batteries, and memory cards – you’ll need them all when that perfect shot appears. Master your camera’s burst mode and autofocus settings before you head out, because wildlife won’t wait for you to figure things out.
Each of the Big Five requires a different approach behind the lens. Lions give you dramatic portraits when you catch them during golden hour, while elephants shine when you capture their family dynamics and gentle interactions. Leopards test your patience and tracking skills, but the payoff is incredible when you finally spot one lounging in a tree. Buffalo photographs work best when you show their imposing presence and herd mentality, and rhinos – well, consider yourself lucky if you see one, and be ready to shoot quickly. The key is staying alert, respecting these amazing animals, and always being prepared for that once-in-a-lifetime moment.